Building Surveying
Jul 16, 2026
Thermal Imaging Survey: A UK Guide for 2026
Get insights on thermal imaging surveys for UK properties. Learn what they detect, costs, how to read reports & find a qualified surveyor in 2026.
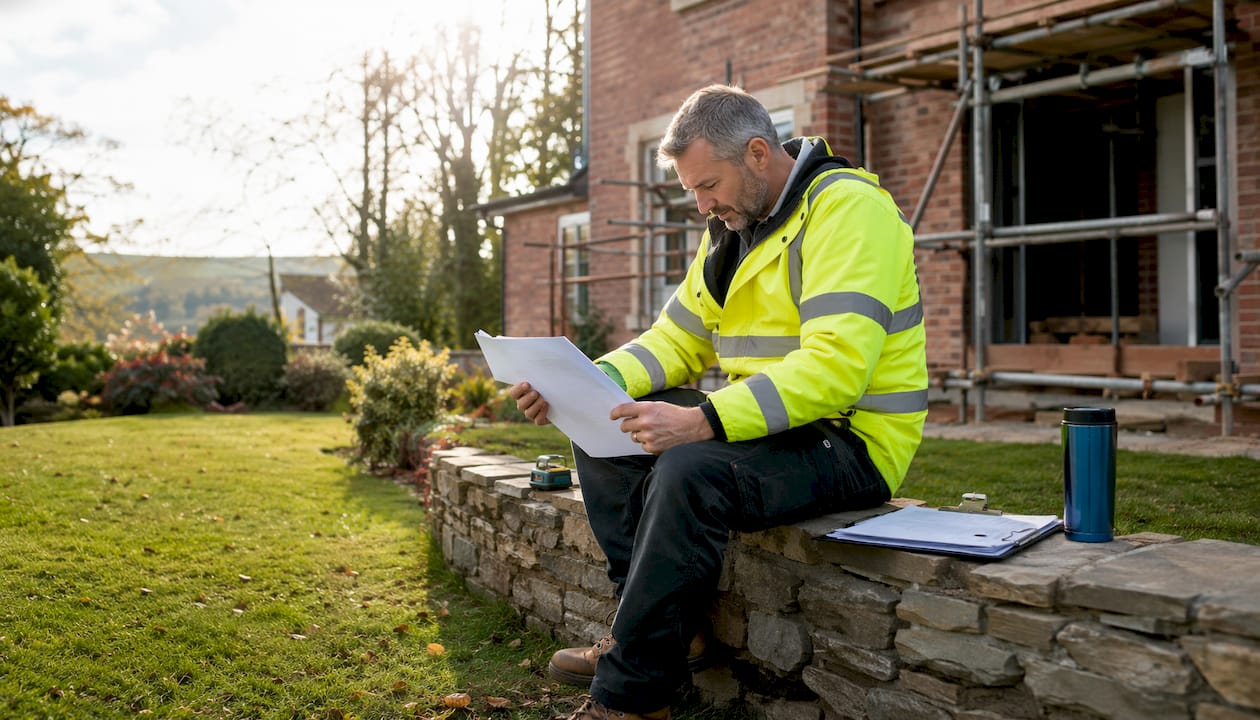
You're probably here because something about a property doesn't feel quite right. A back bedroom is colder than the rest of the house. There's a patch of condensation that keeps returning. A seller says the insulation was upgraded, but the place still feels draughty. You want evidence before you commit money, time, or worry.
A thermal imaging survey can help, but only if you understand what it's telling you. The camera doesn't hand you a diagnosis. It gives you a visual clue about where a building is behaving differently from the areas around it. Used properly, that clue can help you decide whether to investigate further, renegotiate a purchase, or budget for repairs with your eyes open.
Most buyers don't ask for a thermal imaging survey because they're fascinated by infrared technology. They ask for one because they've noticed a symptom and want to know whether it points to a nuisance or a genuine defect.
That symptom might be a cold strip along an external wall, a stale smell in a corner room, or a tenant complaint that one part of the property never warms up. None of those signs proves a defect on its own. They're prompts. A thermal survey helps you see whether the surface temperatures support that suspicion.

A thermal survey is often useful when you need clarity on issues such as:
If your interest is broader energy performance rather than one localised defect, it also helps to read about property energy deficiencies surveys, which look at how a building is losing efficiency across the whole envelope.
Practical rule: If a problem keeps recurring but remains visually vague, thermal imaging can help turn a hunch into something inspectable.
The main value is peace of mind with direction. If the image shows no notable anomaly in the area that concerned you, that's useful. If it does show a clear pattern, you've got evidence to take to the next stage.
That next stage matters. A thermal image can support better property decisions, but the key question is always the same. What should you do now? That's where many buyers get stuck, and it's where a good surveyor earns their fee.
A thermal camera doesn't see through walls like something from a science fiction film. Think of it as reading the skin temperature of the building. It produces a heat map of surfaces, not a picture of what's hidden inside the structure.
That distinction matters because it explains both the usefulness of the survey and its limits. If one section of wall is colder than the wall beside it, the camera shows the difference clearly. What it can't do by itself is declare the exact cause with certainty.
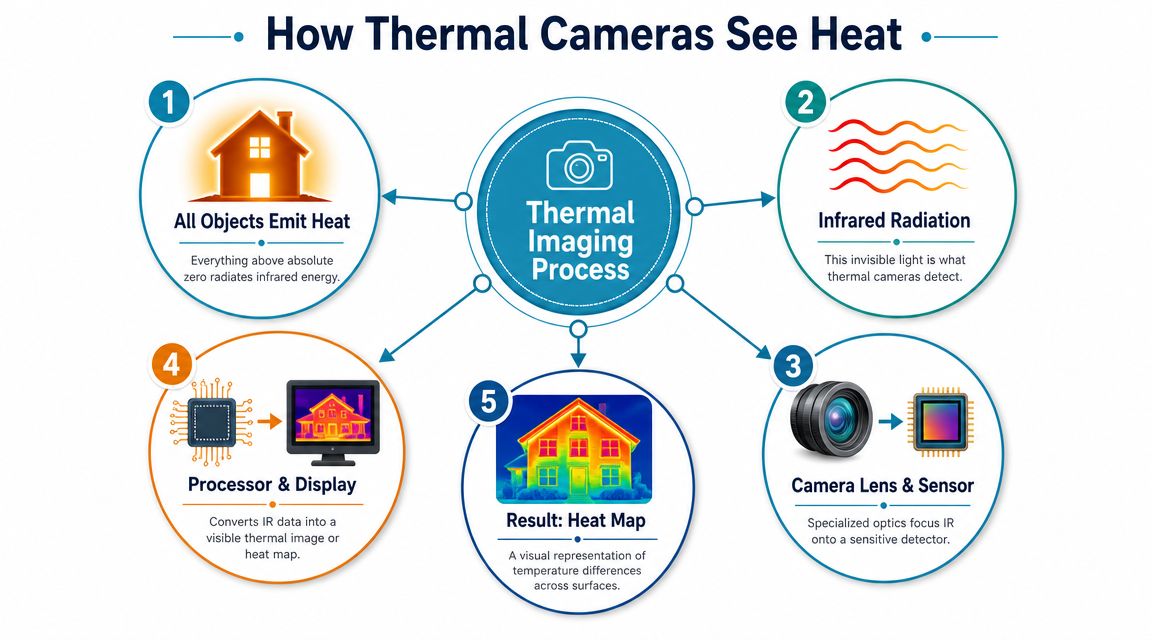
Everything in a home gives off infrared energy. The camera detects that energy from the surface it's pointed at, then converts the reading into a visible image. Different colours represent different surface temperatures.
Thermal imaging is comparable to weather mapping. A weather map doesn't show you the air molecules themselves. It shows patterns. A thermal image works in much the same way. It highlights warmer and cooler areas so the surveyor can look for patterns that shouldn't be there.
According to NHBC guidance, thermographic surveys in the UK should follow BS EN 13187:1999, and the method is limited to surface temperature only. It cannot see through materials like brick and is most effective for identifying thermal bridging, missing insulation, and air leakage when conditions are right, as set out in the NHBC thermal imaging report guide.
A cold patch can mean different things. It might suggest missing insulation. It might point to a draught. It could also reflect moisture-related evaporation at the surface. The image is the clue. The surveyor's job is to read that clue in context.
That's why experienced thermographers compare what they see with the building layout, construction type, heating pattern, and visible condition. A Victorian solid wall behaves differently from a modern cavity wall. A bay window junction behaves differently from the middle of a plain wall.
If you're curious about how different thermal devices are chosen in other practical fields, this piece on choosing HIKMICRO for the veld is a useful example of how lens choice, image quality, and use case affect results. The same principle applies in buildings. The hardware matters, but only in relation to the job.
A thermal image is best read as evidence of difference, not proof of cause.
Once you understand that, the rest of the report becomes much easier to use sensibly.
Not every thermal imaging survey is commissioned for the same reason. Some are tightly focused. Others sit inside a much broader assessment of the property.
The right choice depends on the question you're trying to answer. If your only concern is suspected heat loss around a dormer cheek or one persistently cold room, a standalone thermal survey may be enough. If you're buying an older house with several signs of disrepair, thermal imaging is often more useful as one part of a wider building survey.
A standalone thermal survey is usually best when you've got a defined concern and want targeted evidence. It's a specialist inspection with a narrow brief.
An integrated survey is different. Here, thermal imaging supports a fuller inspection, commonly alongside a Level 3 building survey where the surveyor is already considering defects, maintenance, construction risks, and likely repair implications.
| Feature | Standalone Thermal Survey | Integrated with Building Survey (Level 3) |
|---|---|---|
| Main purpose | Investigates a specific thermal concern | Adds thermal evidence to a broader assessment |
| Best for | Suspected insulation gaps, draughts, cold spots | Older, altered, or higher-risk properties |
| Report focus | Thermal patterns and likely areas of concern | Thermal findings linked to overall building condition |
| Decision value | Helps decide whether further specialist testing is needed | Helps prioritise defects, negotiation points, and repair planning |
| Context provided | Narrower, issue-led | Wider, fabric-led and purchase-led |
| Typical client | Homeowner, landlord, or buyer with one main query | Buyer seeking a deeper pre-purchase picture |
Better value doesn't always mean cheaper. It means getting the evidence that fits the decision in front of you.
A standalone survey is often the sensible option when:
An integrated survey tends to suit buyers when:
Where roof-level heat loss or inaccessible high-level details are part of the picture, Survey Merchant's UK drone advice is worth reading because thermal evidence is often strongest when paired with clear visual access.
The key is to avoid commissioning a narrow survey when your real problem is broad uncertainty. Buyers do this all the time. They ask a very precise question because they're hoping for a tidy answer. Older buildings rarely cooperate.
A good thermal survey makes hidden patterns visible. It doesn't turn the building transparent. What it does is show where surface temperatures behave differently from the surrounding construction, and that often points towards a defect worth checking.
The most helpful way to understand this is by looking at common scenarios a surveyor sees on site.
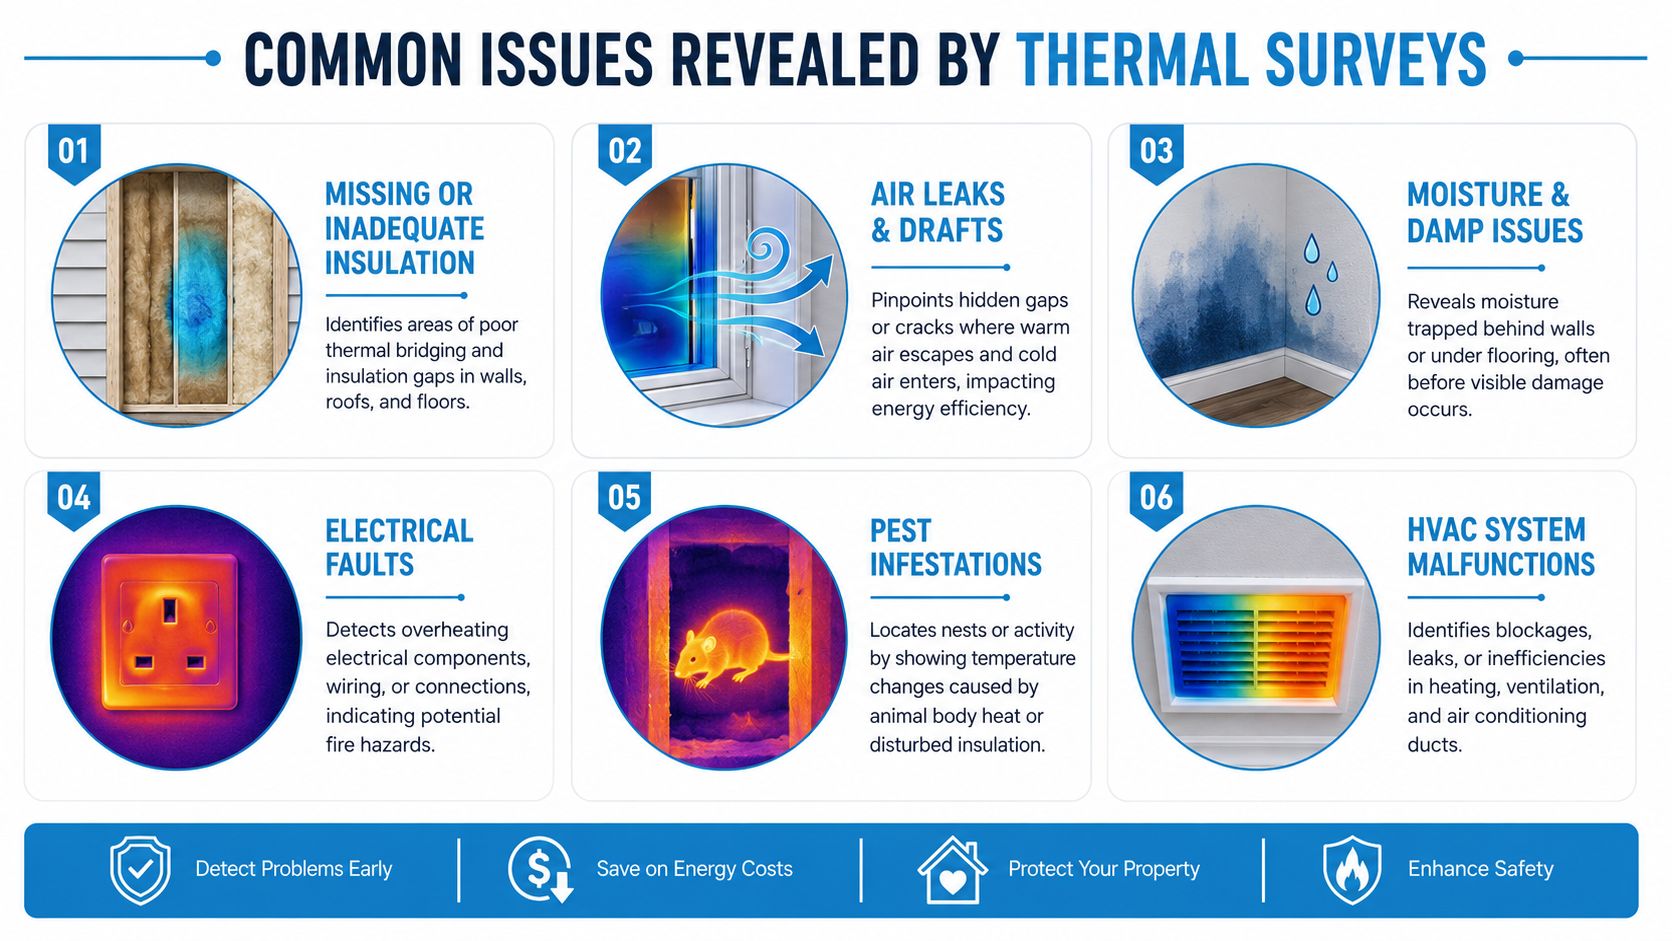
This is one of the clearest uses of thermal imaging in homes. A ceiling or wall should usually show a reasonably consistent pattern. When one section appears noticeably cooler than the adjacent areas, it can suggest missing, thin, displaced, or poorly installed insulation.
A loft hatch is a classic example. The owner says the loft was insulated years ago, but the bedroom below still feels cold. On the thermal image, the main ceiling reads fairly evenly, yet one strip near the eaves presents as distinctly colder. That doesn't prove the insulation is absent, but it strongly suggests that section isn't performing like the rest.
Air leakage often shows up around windows, doors, loft hatches, service penetrations, and junctions between different building elements. The camera won't photograph the moving air itself. It shows the cooler surface effect left by that movement.
If you stand beside a window and feel a slight draught but can't see any visible gap, thermal imaging may show cooler lines around the frame or reveal. That helps separate a vague comfort complaint from a likely sealing or fitting issue.
Cold air leaks are rarely dramatic in daylight. On a thermal image, they often show up as thin, telling patterns around edges and joints.
For readers particularly interested in roof-related heat loss, this guide to thermal roof inspections for homeowners gives a useful overview of how thermal patterns are interpreted in upper building elements.
Moisture-related issues are where many readers get confused. A thermal camera does not measure moisture content directly. What it may show is a colder surface area associated with evaporation or altered thermal behaviour.
That means a cool patch on a wall could be consistent with damp, but the surveyor still needs to consider other evidence such as staining, salt deposits, ventilation, plumbing routes, and construction type. Thermal imaging is often the first clue, not the final answer.
This short video gives a practical sense of what inspectors look for in the field:
Thermal imaging is also used to identify hot spots in electrical systems. In a domestic setting, that may include consumer units, sockets, switches, or localised wiring issues where an abnormal heat pattern suggests stress or poor connection.
This use is different from building fabric thermography, but the logic is the same. The surveyor isn't seeing inside the component. They're spotting a surface temperature pattern that doesn't look normal compared with surrounding components or nearby equivalent parts.
Underfloor heating systems can sometimes show clear flow patterns through floors. If one circuit is underperforming, blocked, or leaking, the thermal pattern may look inconsistent or interrupted.
The practical benefit here is obvious. Instead of lifting flooring blindly, you can target the suspicious area. That can save disruption and reduce unnecessary opening up.
You view a thermal image and spot a dark patch on an outside wall. It is easy to jump straight to damp, missing insulation, or a hidden leak. That is where costly mistakes begin.
A thermal imaging survey is best understood as a screening tool. It shows where the building behaves differently from the areas around it. The surveyor's job is then to ask the next question. What would cause that pattern here, in this type of construction, under these conditions?
The camera works a little like a doctor's thermometer used across an entire building surface. It can show that one area is running cooler or warmer than expected. It cannot, on its own, tell you why. The so what for a buyer is simple. A strong-looking image is only useful if the conditions were right and the interpretation was disciplined.
Thermal contrast is what makes defects visible. If the inside and outside temperatures are too close, the building is not under enough thermal stress for weak spots to stand out clearly. You may get a neat-looking image that hides a real problem, much like trying to spot a draught on a still, mild day.
External surveys are also sensitive to timing. Walls, roofs, and render can hold heat from earlier sunshine and release it slowly. Hours later, the camera may still be picking up stored solar warmth rather than a defect in the building fabric.
That is why a careful surveyor pays close attention to weather, recent sun exposure, how long the heating has been on, and whether rooms have been used normally. The report matters more when the survey conditions are explained clearly, because that tells you how much confidence to place in the patterns shown.
Several everyday factors can create misleading thermal patterns:
The practical point is this. A good survey report should not just show images. It should explain what might have influenced them and where caution is needed before you spend money or renegotiate.
Thermal cameras read surface temperature patterns. Hidden defects do not always reach the surface clearly, and visible anomalies can have more than one cause. A cold patch might relate to missing insulation, air leakage, moisture, or a change in materials behind the plaster.
This is why sensible follow-up matters. If the concern is moisture, decay, or concealed timber defects, the next step may be a more targeted inspection rather than immediate repair works. A dedicated damp and timber report guide can help you judge what additional evidence is worth getting.
A thermal image shows a pattern. The decision comes from understanding what that pattern is likely to mean, how reliable the survey conditions were, and whether the issue justifies further investigation.
That is the mindset that turns a thermal survey from an interesting picture into something you can use with confidence.
A thermal imaging survey offers practical utility. The image itself isn't the outcome. The decision is the outcome.
A common gap in understanding is that a thermal survey is a visualisation tool, not a final diagnosis. Its real value lies in helping a buyer or homeowner decide when to commission further intrusive testing, budget for repairs, or renegotiate a purchase, as discussed in this guide on using thermal imaging as a decision tool.
If the report shows a clear thermal anomaly and the likely consequences are significant, further investigation is usually the sensible next move. That might mean opening up a small area, carrying out moisture testing, checking a service route, or asking a building surveyor or contractor to inspect the detail more closely.
Examples include:
Not every anomaly needs intrusive work. Sometimes the pattern is clear enough, and the remedy low-risk enough, that you can budget for improvement works after purchase.
Buyers often ask whether a thermal report is enough to renegotiate. The honest answer is yes, sometimes, but only when it's presented sensibly.
A seller is unlikely to accept a vague statement that “the house looks cold in places”. They are more likely to engage if the report shows a coherent pattern, the surveyor explains the likely implication, and the next step is commercially reasonable.
Here's a practical lens through which to interpret this:
| Finding type | Sensible buyer response |
|---|---|
| Minor localised draughting | Budget for sealing and maintenance |
| Widespread insulation inconsistency | Seek repair estimates and consider price discussion |
| Possible damp-related anomaly | Request further investigation before exchange |
| Heating system irregularity | Ask for servicing records or specialist inspection |
| Electrical hot spot | Treat as a safety issue and pursue urgent follow-up |
Don't ask a thermal image to do the job of a quotation or a diagnosis. Ask it whether the risk is big enough to justify the next step.
For homeowners, the same logic applies. Use the report to sort issues into three buckets:
That's how the report stops being an interesting graphic and starts earning its place in the decision.
A buyer books a thermal survey, receives a set of striking colour images, and still has no clear answer to the question that matters. Is this a minor maintenance issue, a reason to investigate further, or a basis for renegotiation?
That usually comes down to the person behind the camera.
Anyone can own thermal imaging equipment. A useful survey requires something different. It requires building knowledge, an understanding of survey conditions, and the judgement to explain what a pattern is likely to mean in a real property transaction. A good surveyor treats the camera like a stethoscope. The tool helps, but the value lies in the person interpreting what they are seeing and deciding what needs follow-up.

Start with a short phone call or email exchange. You are listening for how the surveyor thinks, not just what they charge.
Useful questions include:
You can also ask about equipment, but keep it in proportion. Camera specification matters because poor resolution can blur small anomalies, much like a fuzzy photo makes it harder to spot a crack in brickwork. Survey conditions matter just as much. As noted earlier, experienced thermographers will usually want a clear temperature difference between inside and outside, and they may recommend evening or night-time work for some external surveys so earlier sunshine does not distort the image.
A clear image helps. A clear opinion is what saves you money.
Two surveyors can stand in the same room and photograph the same cold patch. The weaker report will label it as heat loss. The better report will relate it to the building's construction, note whether the pattern is consistent with missing insulation, air leakage, moisture, or thermal bridging, and explain what that means in practice. For a buyer, that might mean asking for invasive checks before exchange. For an owner, it might mean improving ventilation before paying for unnecessary wall works.
That is a key test of competence. The surveyor should be comfortable saying when a finding is only suggestive, when it supports further investigation, and when it points to a practical remedial route. Thermal imaging is a screening tool. It works best when the report turns patterns into decisions.
If you need a qualified professional to carry out a thermal imaging survey or a broader property inspection, Survey Merchant helps connect you with vetted UK surveyors who can match the survey to the problem, explain the findings clearly, and give you practical advice you can act on.
Survey Merchant provides vetted RICS surveyors across 100+ UK locations at fixed fees:
→ Level 2 Home Survey (HomeBuyer Report)
→ Level 3 Building Survey (full structural survey)
→ RICS Red Book property valuations
→ Party wall surveyors — notices, awards & schedules of condition
→ Expert witness surveyors — CPR Part 35 reports for property disputes