So, what exactly is a Level 3 Survey? Known formally as a RICS Building Survey, it’s the most comprehensive pre-purchase inspection you can get for a property in the UK. Think of it as a full-body health check for a house, designed to uncover every visible issue and dig for potential hidden problems before you sign on the dotted line. It's the go-to choice for properties that are older, have been significantly altered, or are looking a bit worse for wear.
Your Essential Guide to the Level 3 Building Survey
When you're buying a home, you'll find there are a few different survey options, each offering a different level of detail. A Level 1 report is a very basic "traffic light" check, really only suited for brand-new, straightforward homes. A Level 2 report goes a bit deeper, making it a popular choice for conventional houses in decent shape.
The Level 3 Survey, however, is the full-on investigation.
Imagine you're thinking of buying a vintage car. A quick look might tell you it’s a beauty, but you’d want a specialist mechanic to pop the bonnet, check the chassis, and inspect every nook and cranny before you hand over your money. A Level 3 Survey does precisely that for a property, especially one that isn't a standard new-build. This makes it an absolute must for:
- Properties over 50 years old
- Buildings that have been heavily altered or extended
- Properties made from unusual materials (like timber frames or thatch)
- Any home that you just have a bad feeling about
Don’t think of this survey as just another cost; it’s an investment in your peace of mind. Catching a single major problem—like hidden structural movement or serious damp—before you buy can save you tens of thousands of pounds in future repair bills. It also gives you powerful evidence for knocking down the asking price.
This infographic gives you a quick visual breakdown of how the three main RICS survey types stack up against each other, so you can see exactly where the Level 3 fits in.

As you can see, the Level 3 Survey is the most exhaustive option available. It's specifically designed for properties that come with a higher risk of defects, whether that's due to their age, construction, or just visible wear and tear. It gives you the in-depth analysis you need to make a fully informed decision on what is, for most of us, the biggest purchase of our lives.
Table of Contents
- Your Essential Guide to the Level 3 Building Survey
- Reading Between the Walls
- Common Risks in Older Properties
- How Much Does a Level 3 Survey Cost and How Long Does It Take?
- Can I Meet the Surveyor at the Property?
- What Happens if the Survey Finds Major Problems?
Why Older UK Homes Make Level 3 Surveys Vital
To really understand what a Level 3 survey is for, you have to look at the unique character of UK property. Unlike countries with lots of new-builds, much of Britain's charm comes from its historic homes. But with age comes a much higher chance of hidden problems that a standard survey could easily miss.

The UK's housing stock is old. Really old. According to the English Housing Survey, around 23% of homes in England were built before 1919, with a staggering 38% built before 1946. A Level 3 survey is the most thorough non-intrusive inspection available, designed specifically for these kinds of properties and the deep scrutiny they demand. You can find the official RICS description for the Level 3 Home Survey for more detail.
This isn’t just about spotting houses that are about to fall down. A beautifully kept Victorian terrace or a charming pre-war semi can easily hide issues from an untrained eye. Decades of small tweaks, evolving building regulations, and the simple ageing of materials create a complex history that only a Level 3 surveyor is trained to unravel.
Reading Between the Walls
Think of an older house as a storybook where every chapter was written by a different person. One owner might have put in an extension, the next took out a chimney breast, and another one rewired the place. While each change made sense at the time, the combination can lead to problems you’d never expect.
A Level 3 surveyor’s job is to read this entire story. They look at how different parts of the building interact, identifying potential conflicts between old and new materials or spotting the subtle signs of a long-forgotten issue resurfacing.
Take that quaint, slightly sloping floor in a Georgian townhouse. It might just be a charming quirk. Then again, it could be an early warning of structural movement that needs expensive underpinning. A Level 3 survey gives you the detailed analysis needed to know the difference, providing clarity and confidence.
Common Risks in Older Properties
The forensic detail of a Level 3 survey is what makes it so good at uncovering issues common in older UK homes. A surveyor will be paying close attention to things like:
- Structural Movement: Searching for signs of subsidence, heave, or historic settlement cracks that might need monitoring or immediate action.
- Complex Damp Issues: Telling the difference between rising damp, penetrating damp, and condensation—all of which need very different and specific fixes.
- Timber Decay: Checking for woodworm or rot in hidden spots like floor voids and roof trusses, which can seriously compromise the building’s structure.
- Outdated Systems: Assessing the condition and potential dangers of old wiring, lead pipes, and inefficient heating systems.
Choosing a Level 3 survey for an older property isn’t being pessimistic; it’s being pragmatic. It ensures you know exactly what you’re getting into and are fully aware of the commitment you're about to make, turning a potential gamble into a well-informed decision.
What a Surveyor Inspects During a Level 3 Survey
So, what actually happens during a Level 3 survey? Think of the surveyor as a property detective. They arrive on-site with a single mission: to methodically work through the property from top to bottom, uncovering not just the obvious flaws but also the subtle clues that could point to more significant, hidden problems.
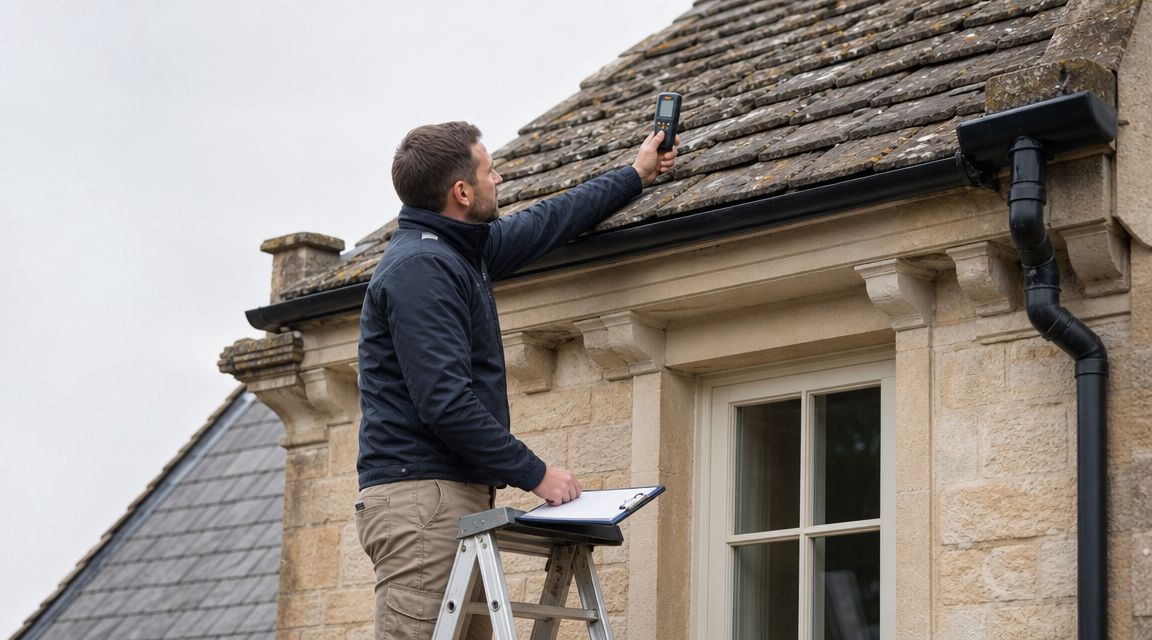
The process is thorough and systematic. It often starts with the exterior, focusing on the hardest-to-reach parts first. This includes:
- Chimney stacks and roofs: Checking for things like damaged tiles, failing lead flashing, or any signs of structural leaning.
- Gutters and downpipes: Looking for blockages, leaks, and ensuring everything drains away from the building as it should.
- Walls and rendering: Inspecting for cracks that might suggest structural movement or damp issues.
- Windows and doors: Assessing their overall condition, how well they fit, and their potential for heat loss.
This external check gives the surveyor a complete picture of the building's "envelope"—the primary shield protecting it from the elements.
A Deeper Look Inside the Property
Once the outside is done, the surveyor moves indoors, continuing their methodical investigation. A Level 3 survey is non-intrusive, which means they won’t be knocking down walls or drilling holes. However, they will access every visible and accessible area. This often means lifting loose floorboards or getting into attic spaces and cellars where it’s safe to do so.
Armed with experience and tools like damp meters, they assess every part of the interior, looking for evidence of problems that a casual viewing would never reveal.
Think of the surveyor as a property doctor using a stethoscope. They can't see inside the walls, but by listening, tapping, and measuring, they can diagnose what’s happening beneath the surface. This is what separates a Level 3 inspection from a simple viewing.
This level of detail is especially important in the UK. According to the English Housing Survey, around 9.0 million homes in England were built before 1946. These older properties have often seen decades of undocumented alterations, creating complex defects that only a detailed assessment will find. You can dig into the UK's housing stock data on GOV.UK for more information.
Key Areas of Focus for a Surveyor
During the inspection, a surveyor zooms in on high-risk areas known for causing the most expensive and disruptive problems. Their investigation is far more detailed than what you'd get in a Level 2 report. For a complete rundown of the process, you can explore what surveyors do when they carry out a Level 3 building survey.
Specific areas of focus include:
- Structural Integrity: The surveyor actively hunts for signs of movement like cracks in walls, uneven floors, or distorted window frames. They’ll then assess the likely cause and severity.
- Damp and Timber Decay: This involves checking for rising damp, damp penetrating from outside, and condensation. They’ll also inspect accessible timbers for wood-boring insects or fungal decay like wet or dry rot.
- Insulation and Energy Efficiency: The inspection covers the condition and amount of loft insulation and other energy-saving measures, which can have a big impact on your future bills.
- Drainage Systems: Where possible, the surveyor will lift accessible manhole covers to check the condition and flow of the drains, looking for potential blockages or structural failures.
- Services: While they won't carry out full specialist tests, the surveyor will visually inspect the plumbing, heating, and electrical systems. They’ll comment on their age and apparent condition, advising if you need to call in a specialist.
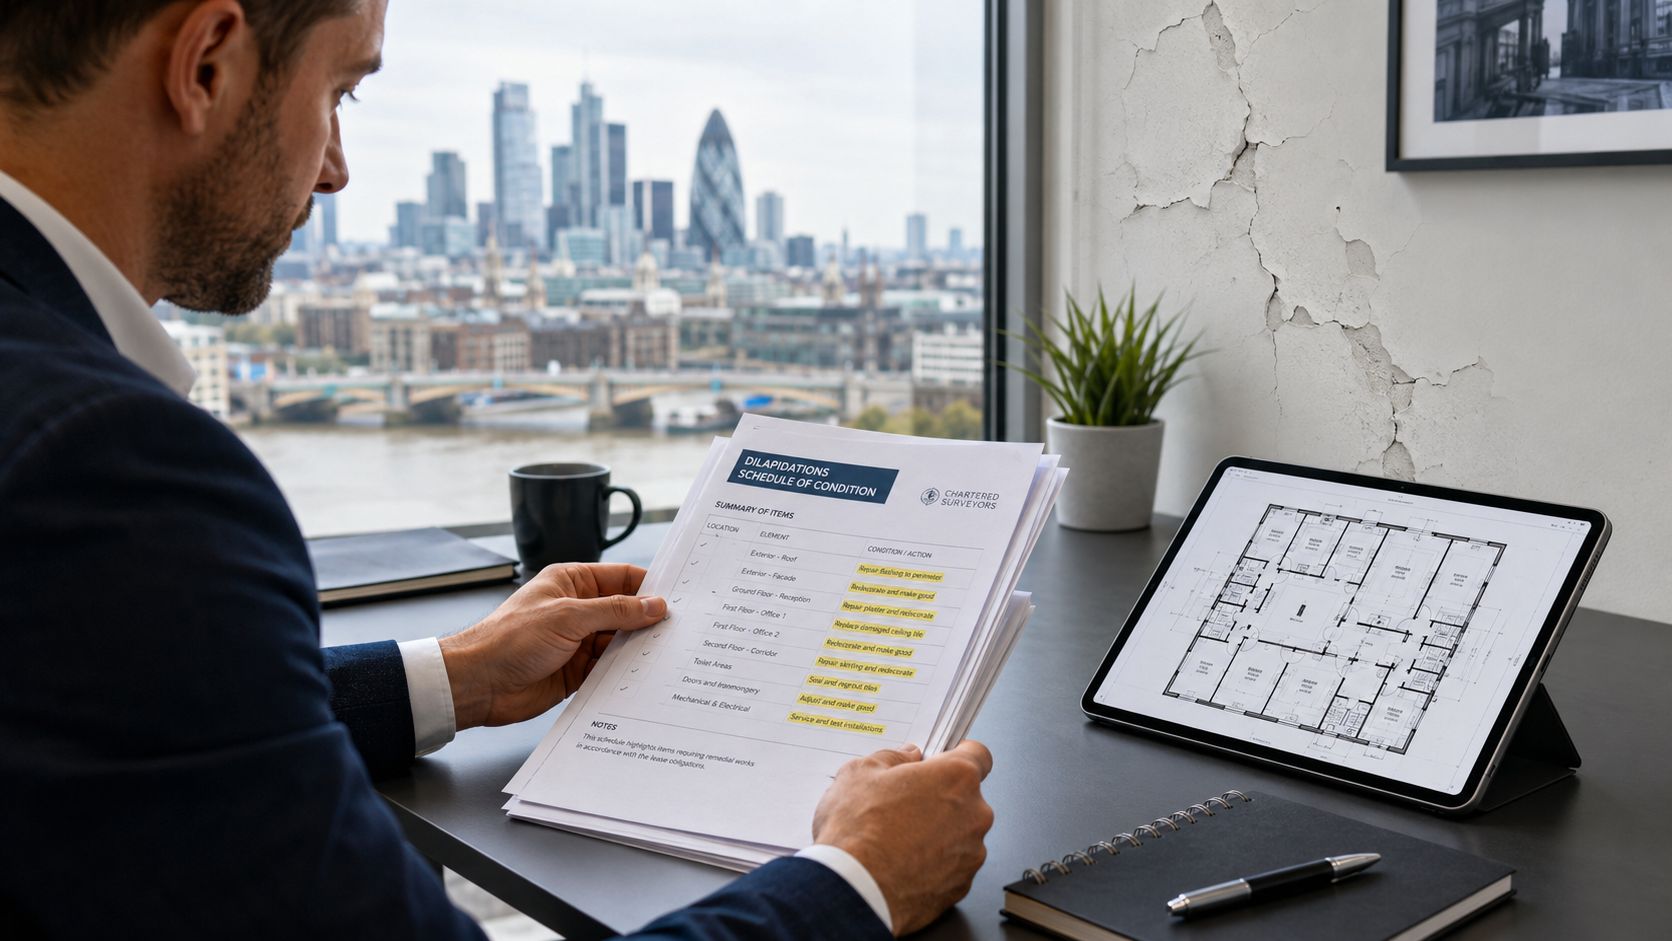
How to Decode Your Level 3 Survey Report
When your Level 3 survey report arrives, it can look a bit intimidating. These are often long, technical documents, but don’t worry—they’re designed to be broken down into clear, actionable advice about your potential new home.
The report is usually organised by different parts of the property, such as the roof, walls, floors, and services. Most importantly, RICS surveyors use a simple traffic light system to show how serious any defects are. This is your first clue to what needs your attention.
Understanding the Condition Ratings
This rating system is the heart of the report. It gives you a quick visual summary of how urgent each issue is. While the exact wording might vary, it generally follows this simple structure:
- Condition Rating 1 (Green): No repair is currently needed. This part of the property is in good shape and just needs normal maintenance.
- Condition Rating 2 (Amber): Defects are present that need repairing or replacing, but not urgently. Think of these as issues you can plan and budget for over time.
- Condition Rating 3 (Red): These are serious defects that demand urgent or specialist attention. These are the red flags that could significantly impact your decision to buy or your negotiation strategy.
When you see a Condition Rating 3, don’t panic. It’s simply your prompt to dig into the surveyor's detailed notes. They'll explain the problem, what’s likely causing it, and what you should do next. This gives you the information you need to act.
From Jargon to Practical Steps
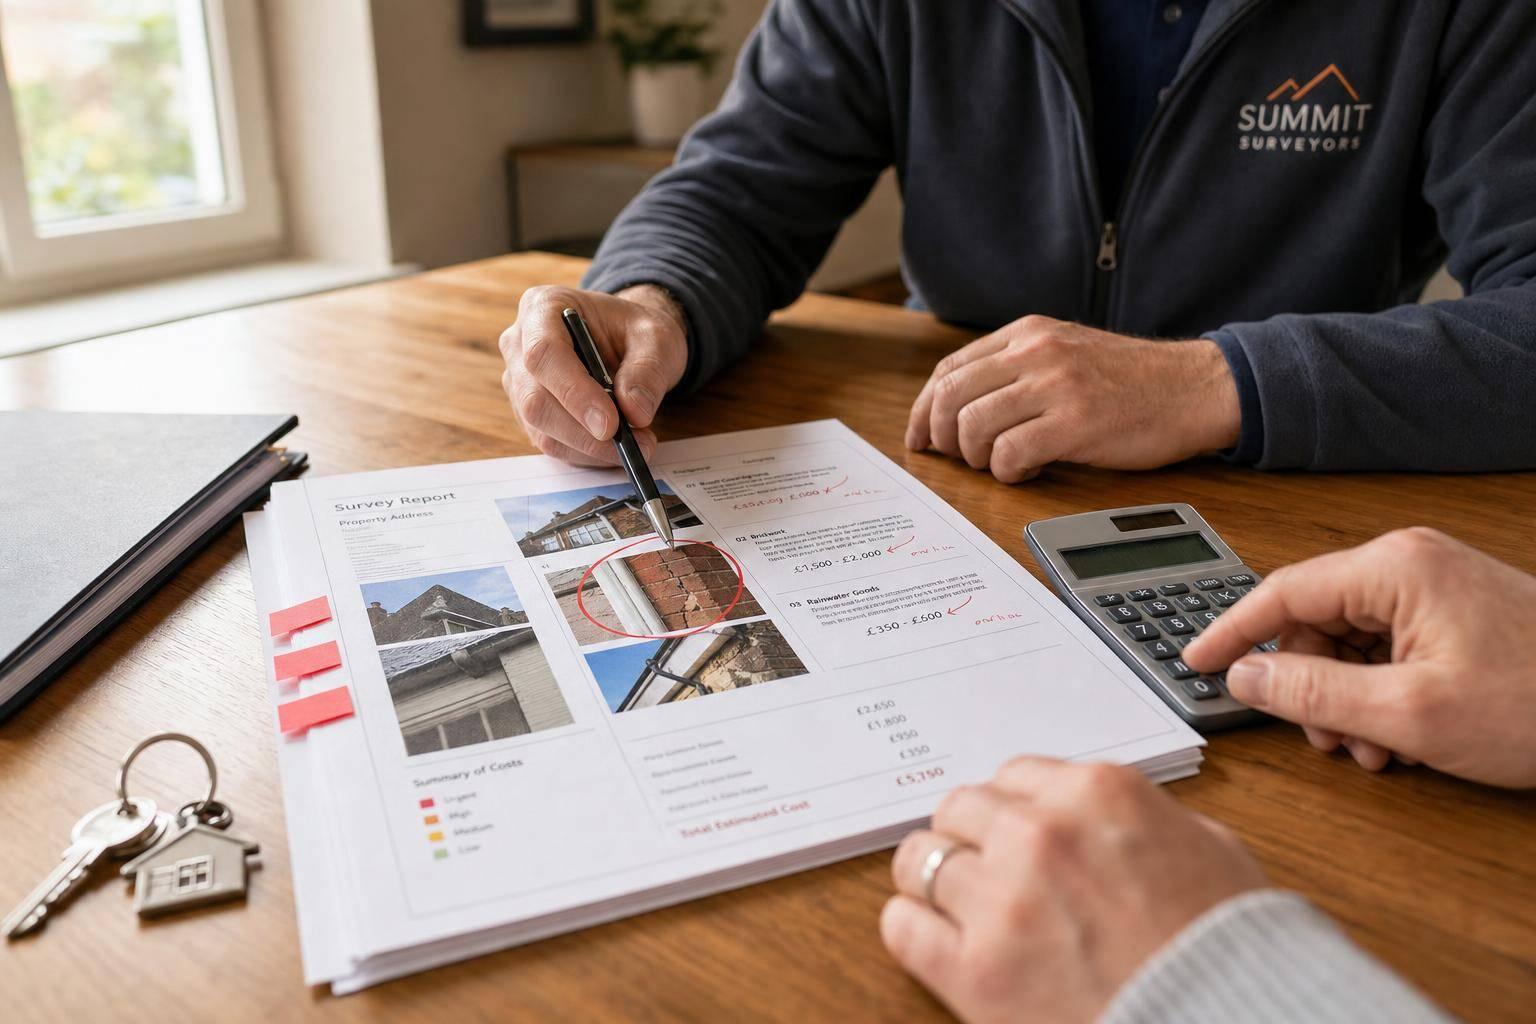
Beyond the ratings, the text in the report gives you the all-important context. A surveyor won't just write "damp was found"; they will describe the type of damp, its probable source, and recommend a specific course of action. This is where you translate technical terms into a practical to-do list.
For instance, the report might state, "Evidence of historic woodworm activity was noted in the sub-floor timbers, and a specialist timber and damp survey is recommended." This doesn’t necessarily mean you have a live infestation, but it advises getting an expert to be sure. To get a feel for the level of detail involved, it can be helpful to see how professionals understand your roof inspection report and other specific assessments.
The purpose of a Level 3 report isn’t to scare you off a purchase. It is designed to give you a complete and unbiased picture of the property’s health, empowering you to make a decision with your eyes wide open.
Ultimately, the report is a powerful negotiation and planning tool. It helps you budget accurately for future repairs and identifies areas where you might need to get quotes from builders or other specialists.
If you’re ever unsure about a particular finding, the best first step is to call the surveyor who wrote the report. They can talk you through their findings and offer more clarity, helping you fully understand your building survey and plan your next move with confidence.
Using Your Report to Negotiate with Confidence
So, your Level 3 survey report has landed in your inbox. This isn't just the end of the survey process; it's the beginning of your next, crucial step. Think of the report as your single most powerful tool for moving forward, armed with impartial facts and professional insight.
The detailed findings clear the way for three potential paths. You can renegotiate the price, ask the seller to fix the problems before you exchange contracts, or, if the issues are too severe, make the difficult but sensible choice to walk away from a property that could become a financial nightmare.
Turning Findings into Financial Leverage
The most common and effective way to use your survey is for renegotiation. When a Level 3 survey uncovers serious defects, especially those with a Condition Rating 3, you have a rock-solid basis for discussing a price reduction. After all, your initial offer was likely based on the assumption the property was in good shape—the report now proves otherwise.
To make your case, you need more than just an opinion.
Your Level 3 survey report is an impartial, expert assessment of the property's condition. It’s not just your opinion against the seller's; it's a professional's documented findings, which estate agents and solicitors take very seriously during negotiations.
This is what gives you real negotiating power. It shifts the conversation from an emotional plea to a straightforward business discussion grounded in facts. You're no longer just asking for a discount; you're presenting a logical argument for why the property's value is lower than what you originally agreed to pay.
The Practical Steps for Negotiation
Once you have the report, it’s time to get organised. Simply forwarding the entire document to the estate agent with a vague request for "money off" won't cut it. A more strategic approach is needed.
- Identify the Major Issues: Zero in on the significant, expensive problems—typically the Condition Rating 3 defects. While minor wear and tear is to be expected, big-ticket items like structural movement, widespread damp, or a roof that needs replacing are your strongest bargaining chips.
- Get Repair Quotes: Reach out to two or three reputable contractors and ask them for written quotes to fix the issues highlighted in the survey. Having specific, justifiable figures makes your request far more compelling than pulling a number out of thin air.
- Present a Clear Case: Always communicate through the estate agent. Draft a polite but firm email that summarises the key defects, attaching the relevant sections of the survey report along with your contractor quotes. Propose a clear price reduction that directly reflects the cost of putting things right.
This method shows you’re a serious buyer who has done their homework. For a deeper dive into tactics, our team has put together some helpful advice on property survey negotiation. By using the report as your guide, you can navigate this critical stage with confidence, potentially saving yourself thousands and steering clear of future headaches.
Answering Your Top Level 3 Survey Questions
So, you understand the what and why of a Level 3 survey, but now the practical questions are probably bubbling up. It’s completely normal. Let’s tackle the common queries we hear from homebuyers every day, giving you clear, straightforward answers to help you move forward.

We'll get into the nitty-gritty of costs, timescales, and what to do if the survey flags something serious. Think of this as your essential briefing for this critical stage of your purchase.
How Much Does a Level 3 Survey Cost and How Long Does It Take?
There's no one-size-fits-all price tag for a Level 3 survey. The cost really depends on the property's size, age, complexity, and even its location. As a general guide, you can expect to pay anywhere from £800 to over £1,500 for this comprehensive inspection.
Yes, it’s more than a Level 2 report, but that extra expense buys you invaluable time and expertise. The physical inspection alone can take several hours—often half a day or more for a larger or more complicated building. Afterwards, the surveyor needs to compile their findings into an extensive report, which you’ll typically receive within 5-10 working days.
It’s a small price for peace of mind. With the average UK house price hovering around £268,000, a survey fee is a drop in the ocean compared to the risk of buying a property with major hidden defects. Uncovering issues like timber decay or structural movement early could save you from four or five-figure repair bills down the line.
Can I Meet the Surveyor at the Property?
Absolutely, and we strongly recommend it. While you shouldn’t plan on shadowing the surveyor for the entire inspection, arranging to meet them near the end can be incredibly useful. It’s your chance for a quick "walk-through" of their initial thoughts.
A face-to-face chat with your surveyor transforms technical findings into tangible reality. It allows you to see a problem for yourself while the expert explains its implications, providing a level of understanding that a written report alone cannot match.
This direct conversation is your opportunity to:
- Ask immediate questions and get instant clarity on anything you’re worried about.
- Visualise the issues as the surveyor points out the specific areas of concern.
- Grasp the severity of a defect more intuitively than by just reading a description.
Just be sure to arrange this in advance. Most surveyors are more than happy to schedule a brief chat at the end of their inspection to give you a verbal summary.
What Happens if the Survey Finds Major Problems?
Seeing a serious issue flagged in your survey report can feel like a punch to the gut, but it’s far from a disaster. In fact, it’s the exact reason you got the survey in the first place—to find problems before you’re legally and financially tied to the property. This knowledge puts you back in the driver's seat.
For instance, if your Level 3 survey reveals something significant like Japanese Knotweed, understanding how it affects your mortgage options and negotiating power is crucial. Specialist advice, like this 2026 guide on knotweed mortgages, can be invaluable here.
When your report flags major defects, you have several clear options:
- Renegotiate the Price: Use the report and quotes for the repair work as evidence to justify a lower offer.
- Request Repairs: Ask the seller to fix the problems before you exchange contracts.
- Walk Away: If the issues are too severe or the seller won't budge, you can withdraw your offer, saving yourself from a potential money pit.
Finding a problem isn't a setback; it's a success. It means the survey has done its job, protecting you from buying the wrong property or paying more than it's worth.
At Survey Merchant, we connect you with qualified, local surveyors who provide the clear, detailed reports you need to make an informed decision. Get matched with the right expert for your property today by exploring our services at Survey Merchant.