Building Surveying
Jul 16, 2026
Dry Rot Treatment: Your 2026 UK Guide
Discover effective dry rot treatment in our 2026 guide. Learn identification, DIY vs. pro options, costs, & when to consult a UK surveyor for fungal decay.
You lift a loose corner of carpet, press a screwdriver into a skirting board, and the timber gives far too easily. Or you catch that stale, mushroom-like smell in a cupboard you rarely open. That's usually the moment concern turns into alarm, especially if you've heard the phrase dry rot and immediately picture floors collapsing or huge repair bills.
That reaction is understandable. In UK buildings, dry rot matters because it isn't just a surface defect. It's a timber-decaying fungus, Serpula lacrymans, and once it establishes itself in the right damp, poorly ventilated conditions, it can move beyond the timber you can see and track into hidden parts of the structure. That's what makes it more serious than a bit of localised decay around a window sill.
I see homeowners make the same mistake repeatedly. They focus on the stained patch, the cracked paint, or the obvious soft board. The main job is finding out whether you're dealing with a small local defect or a wider structural problem. That distinction decides whether a careful DIY repair is reasonable or whether you need an experienced surveyor and remedial contractor involved straight away.
The same principle applies across building defects generally. If water is getting into the fabric, the visible symptom is rarely the whole story. Even guides on South Florida roofing solutions are useful in that respect, because they remind property owners to think from the water entry point inward, not just from the internal damage outward.
Dry rot is often described too loosely. People use it to mean any rotten wood, any damp smell, or any crumbly skirting. That's unhelpful. Properly speaking, dry rot is a specific fungal decay problem that attacks timber after excess moisture allows it to establish itself. Once active, it can affect hidden joist ends, floorboards, wall plates, built-in joinery, and timber embedded near damp masonry.
The reason surveyors treat it seriously is simple. The visible damage is often the smaller part of the story. A skirting board may look poor because it's the first accessible timber in the chain, while the more important issue sits under suspended floors, behind plaster, or at the ends of structural members.
Wet rot usually stays where conditions are persistently wet. Dry rot is more troublesome because it can spread from the original damp source and appear in places the homeowner doesn't associate with a leak.
Dry rot treatment fails when people treat the timber but leave the building defect in place.
That's why any sensible response starts with three questions:
The practical route is usually straightforward, even if the works themselves are disruptive. Confirm what the decay is. Find and stop the moisture. Expose the concealed spread if needed. Remove decayed timber. Treat adjoining areas where appropriate. Reinstate with suitable pre-treated timber. Then improve the conditions that allowed the fungus to establish itself in the first place.
If your problem is small and clearly local, you may be able to handle part of it yourself. If there's any doubt about hidden spread, suspended timber floors, staircase supports, roof timbers, or embedded beam ends, caution is the correct response.
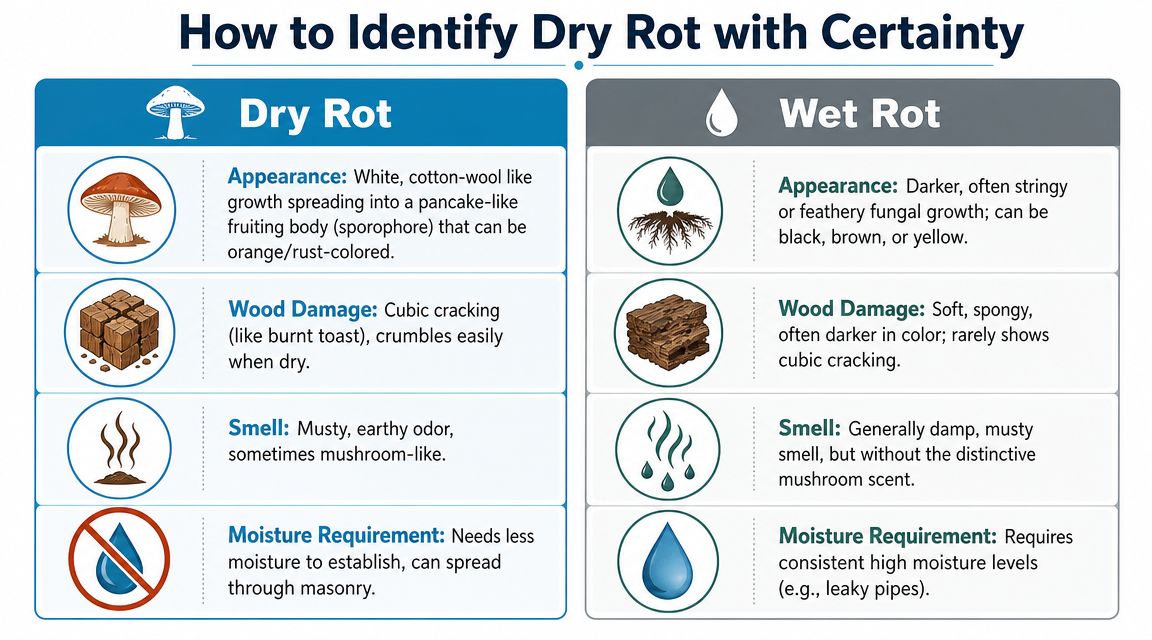
Dry rot is often misidentified. Homeowners see flaky paint or a soft window board and assume the worst. Others do the opposite and dismiss obvious fungal decay as “just a bit of damp.” Neither helps. The first task is to identify what you're looking at with reasonable confidence before deciding on treatment.
For a broader explanation of how moisture-related damage can affect indoor conditions as well as the building fabric, this guide on water damage and health concerns is worth reading alongside any inspection.
Start with your senses. Dry rot tends to leave a recognisable combination of visual and physical clues.
A useful cross-check is this homeowner's guide to property rot, which helps distinguish the common forms of timber decay found in houses.
Practical rule: If you can see fungal strands crossing masonry or reaching from one timber element towards another, treat the situation as potentially more serious than a simple local leak.
Wet rot usually behaves more plainly. It tends to stay close to the moisture source and doesn't usually present the same dry, cuboidal fracture pattern.
Look for these contrasts:
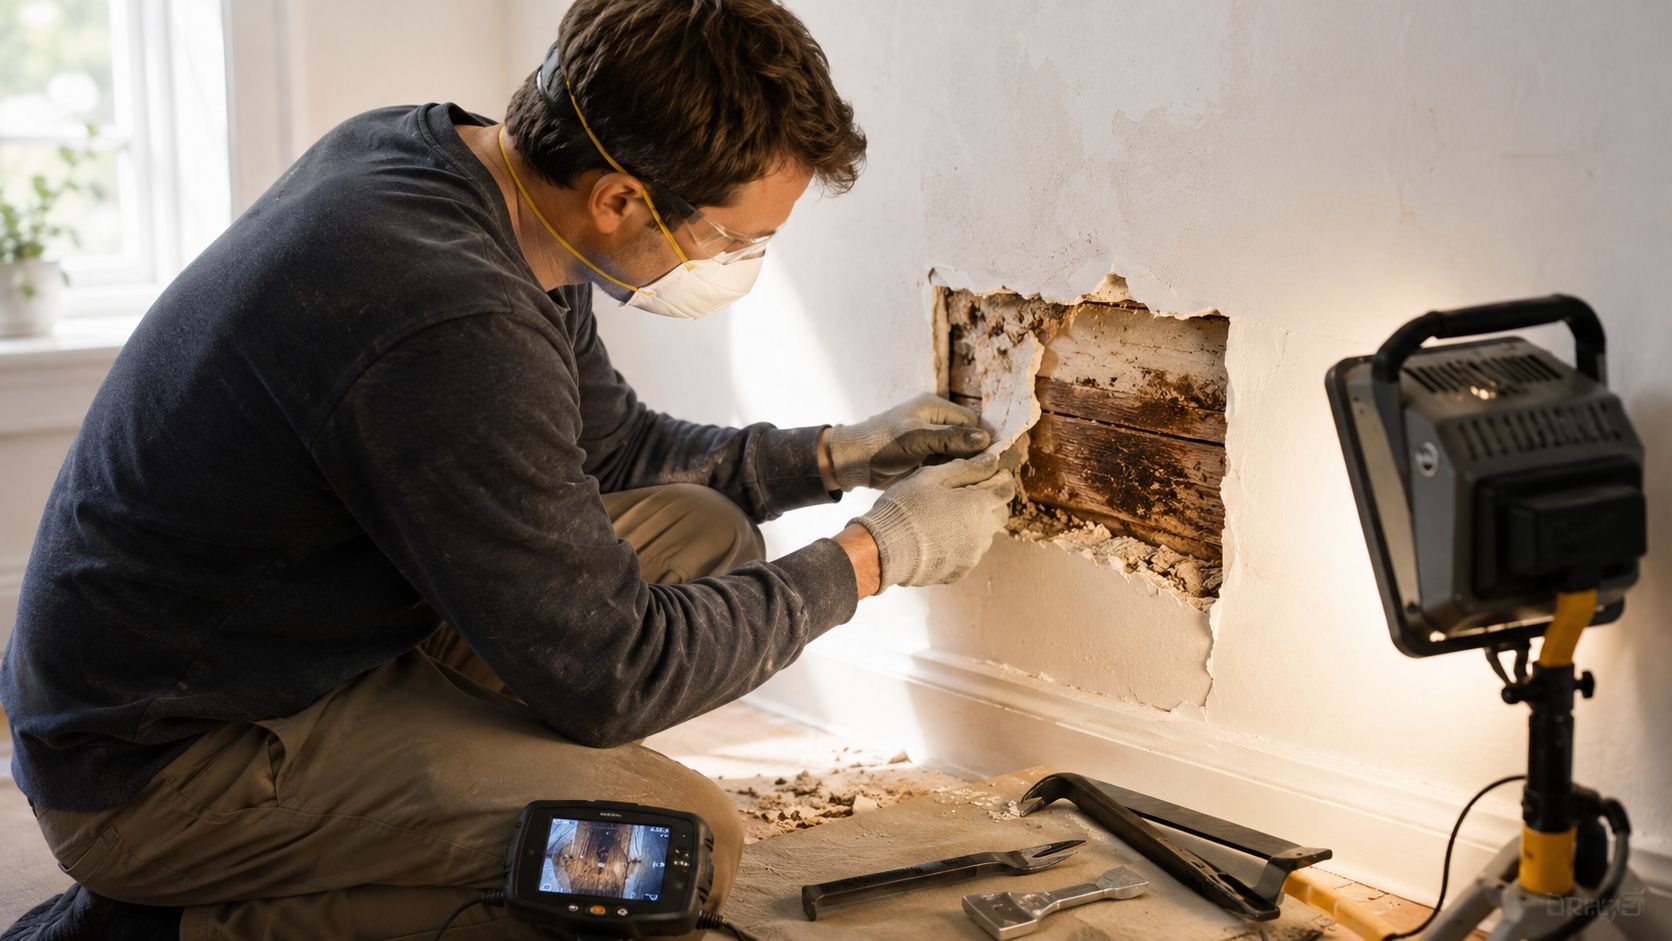
Use a torch, a thin bradawl or screwdriver, and common sense. Check skirtings, floor edges, understairs cupboards, cellar ceilings, and the underside of suspended timber floors where accessible. Probe suspect timber gently. Sound wood resists. Decayed wood yields too easily or breaks away.
Don't rip out half the room on first suspicion. But don't redecorate over the signs either. If the decay appears near structural timbers, under floors, or beside damp masonry, you need a more thorough assessment than surface observation alone can provide.
The first response isn't treatment. It's containment. Your aim is to deny the fungus the conditions it needs while you work out the extent of the problem and arrange proper repairs.
If the outbreak sits beside a known damp wall, failed gutter run, or plumbing defect, start there. Many homeowners benefit from reading property damp issues explained before they start lifting boards or stripping finishes, because it helps connect the fungal problem to the moisture pathway.
Dry rot treatment doesn't begin with a tin of chemicals. It begins with water control.
Take these steps immediately:
If the timber is badly weakened, don't keep testing it with your foot or load it with furniture. A floor can feel “slightly springy” right up to the point it doesn't.
Ventilation matters because stagnant air and trapped moisture help fungal growth. Open windows where practical. Clear blocked vents. Lift fitted items away from cold external walls if safe to do so. In sub-floor areas, make sure air bricks aren't blocked externally by soil, paving, or vegetation.
Avoid one common mistake. Don't start hacking out every visible fungal strand before you understand where it leads. That can spread debris, expose hidden voids, and create more mess without solving the cause.
If you've found dry rot in one visible spot, assume there may be more concealed behind finishes until proven otherwise.
A short practical overview can help if you're trying to understand what a proper first inspection looks like:
These actions are first aid only. They can slow the problem. They won't cure it.
This is the question most owners really want answered. Can you deal with it yourself, or do you need a specialist and a surveyor involved?
The honest answer is that some small outbreaks are suitable for careful DIY work. Many are not. The dividing line isn't confidence. It's whether the issue is local and non-structural, or whether it affects timber that contributes to the building's stability or may be hiding wider spread.
That distinction is often missed. Guidance on dry rot treatment and the structural versus local repair issue notes that the right approach is to remove timber that shows decay and identify timber that has lost structural strength, rather than automatically replacing large areas of sound wood. That nuance matters in real houses. A decayed cupboard batten is one thing. A decayed joist end in a suspended floor is another.
In practice, DIY treatment is only sensible where all of the following apply:
If any one of those points isn't satisfied, the job shifts out of DIY territory.
| Consideration | DIY Approach (Suitable for...) | Professional Treatment (Essential for...) |
|---|---|---|
| Location of decay | Small, exposed, non-structural timber | Floors, joists, roof timbers, stair components, lintels, embedded ends |
| Extent | Clearly local and fully visible | Hidden spread, multiple rooms, voids, masonry involvement |
| Moisture source | Obvious leak already fixed | Uncertain cause, recurring damp, mixed defects |
| Type of work | Local cut-out and replacement of minor timber | Opening up, diagnosis, specification, structural repair |
| Risk if wrong | Limited if genuinely isolated | High risk of concealed ongoing decay and structural weakness |
| Best next step | Careful repair and close monitoring | Surveyor assessment and contractor-led remedial works |
Use this as a practical filter.
A cosmetic repair over structural decay isn't a repair. It's a delay.
The biggest DIY failures usually come from treating symptoms. People harden the surface with filler, paint over staining, or replace one visible board while the damp source and hidden spread remain. That wastes time and often makes later opening-up more disruptive. For anything beyond a very small and obvious defect, professional diagnosis is cheaper than false confidence.
When dry rot treatment is handled properly, the process is methodical. It isn't just spraying timber and hoping for the best. A competent contractor and surveyor work from diagnosis to repair in a clear sequence.

The first stage is inspection. That often means more than a visual look. Floors may need to be lifted locally. Joinery may need to be exposed. Plaster may need to be opened where spread into adjoining fabric is suspected. The point is to define the actual outbreak, not just describe the stain the owner can see.
A good surveyor will separate three things:
Those are related, but they are not identical. One leak can create a limited fungal issue, while a modest visible patch can conceal more serious timber loss in a bearing end or floor zone.
Once the affected extent is understood, decayed timber is cut out. UK guidance on treating dry rot and wet rot advises cutting back timber at least 500 mm beyond the last visible signs of fungal growth or hyphae strands, then removing fruiting bodies, cleaning adjacent masonry, and treating remaining sound timber with a dual-purpose dry-rot fluid. The same guide notes that timber strength can fall by up to 50% with only 1% weight loss. That is exactly why competent contractors don't judge soundness by appearance alone.
In a proper remedial sequence, you can generally expect:
The quality of dry rot treatment is usually decided before the fungicide appears. It depends on how accurately the spread has been mapped and whether the damp defect is actually resolved.
A professional approach should also avoid unnecessary destruction. Not every nearby timber needs wholesale replacement if it is sound and unaffected. Good practice is targeted, not reckless. But it is also uncompromising where structural weakening is identified.
Homeowners often hesitate. They suspect dry rot, worry about the likely bill, and put off the inspection. That delay is usually what turns a manageable repair into a disruptive one.
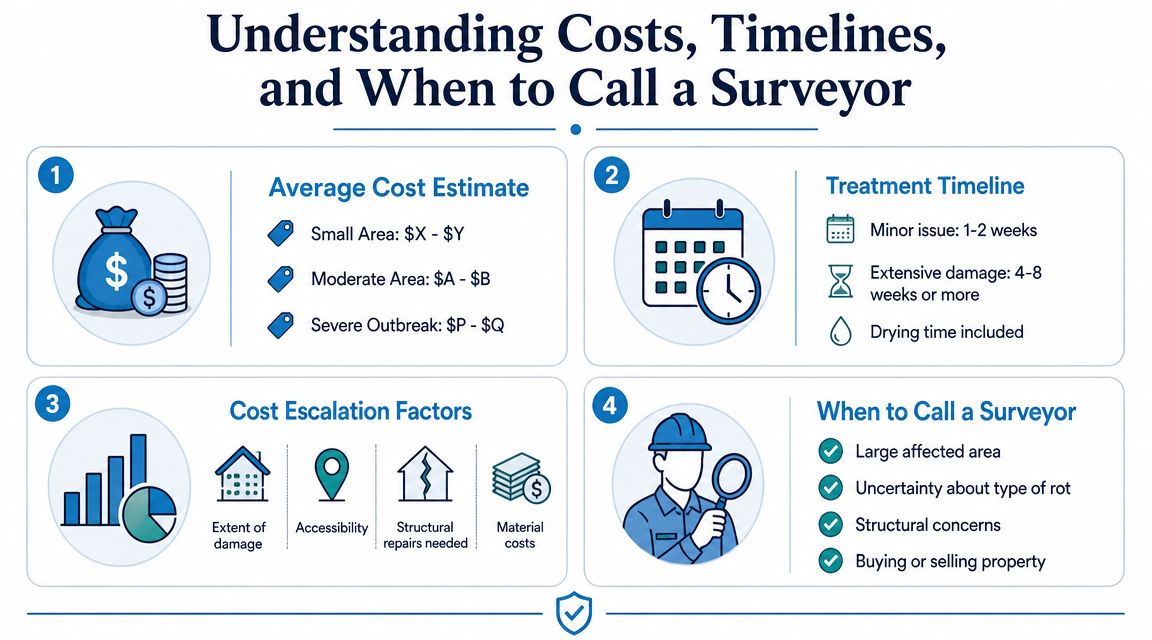
One treatment guide on dry rot costs and repair escalation reports typical costs of $500-$2,000 for small areas, $5,000-$25,000 for moderate infestations, and $25,000-$150,000+ for extensive structural damage. The same guide states that early detection can reduce costs by 60-80% compared with delayed intervention. The currency isn't UK-specific, but the principle is the same in British property. Early action usually means less opening-up, less timber replacement, less plaster renewal, and fewer knock-on repairs.
You can't sensibly price dry rot from a photograph. But you can understand the pattern. A small local repair stays small only if the outbreak is local and the moisture issue is stopped quickly.
The main variables are practical, not mysterious:
Timelines vary for the same reasons. Some jobs are relatively contained. Others require staged works, drying periods, joinery lead times, and broader building repairs. If anyone offers a neat one-size-fits-all timetable from the outset, be sceptical.
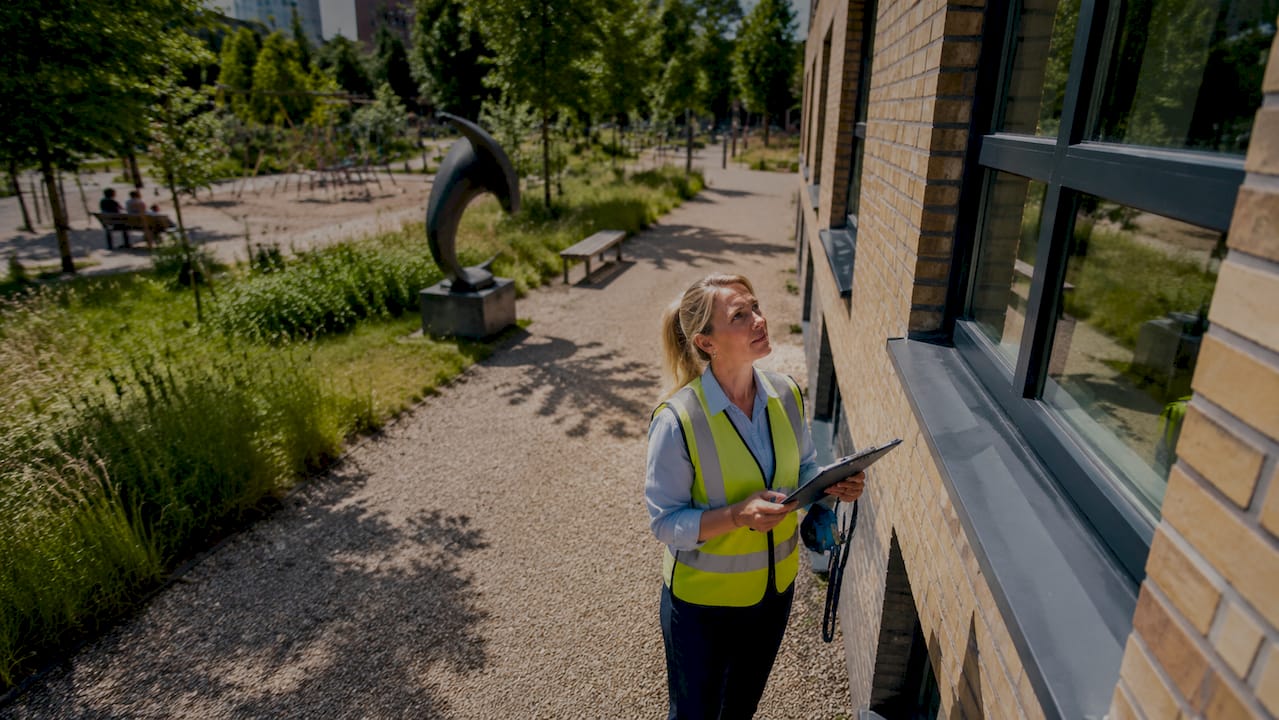
The optimal time to involve a surveyor is often earlier than anticipated. If you're unsure whether the issue is dry rot at all, if the decay may affect structure, or if you need an impartial scope of works before contractors start pricing, a surveyor gives you a defensible starting point.
That matters because a treatment-only contractor is there to sell treatment. An independent inspection is there to identify the defect properly, assess its significance, and describe the remedial works required. For buyers, sellers, landlords, and owners facing conflicting opinions, that difference is important.
If you need background before arranging a report, this guide to understanding property damp and timber issues is a useful starting point.
If you don't yet know the extent, the cause, or whether the timber is structural, you're not ready to approve remedial works.
In practical terms, call a surveyor when:
Prevention is less dramatic than treatment, but it's where most money is saved. Dry rot doesn't need panic. It needs disciplined building maintenance.
Use a simple checklist:
Good dry rot treatment deals with the outbreak. Good property management stops the next one.
If you need an impartial opinion before committing to repairs, Survey Merchant can connect you with a suitably qualified UK surveyor for clear, independent advice on damp, timber decay, structural risk, and the scope of remedial works. That's often the safest first step when you need facts rather than salesmanship.
Survey Merchant provides vetted RICS surveyors across 100+ UK locations at fixed fees:
→ Level 2 Home Survey (HomeBuyer Report)
→ Level 3 Building Survey (full structural survey)
→ RICS Red Book property valuations
→ Party wall surveyors — notices, awards & schedules of condition
→ Expert witness surveyors — CPR Part 35 reports for property disputes

