Leasehold
Jul 6, 2026
Property Survey Checklist: What to Expect During Inspection
Learn what surveyors check, the three RICS survey levels, condition ratings (CR1-CR3), and how to prepare, interpret and act
A property survey is a detailed inspection of a home's condition, carried out by a qualified surveyor to identify issues like structural defects, damp, or legal risks. While not legally required in the UK, it can save you significant costs by uncovering hidden problems before purchase. Surveys come in three levels, tailored to property age and condition:
Surveyors examine the property inside and out, checking for damp, rot, structural issues, and more. Their report uses a traffic light system (Condition Ratings) to categorise problems:
To prepare, ensure access to all areas, gather key documents (e.g., gas safety certificates), and address minor fixes. After the survey, use the report to prioritise repairs, negotiate the property price, or plan further investigations.
Quick Overview of Survey Levels:
| Survey Level | Best For | Inspection Depth | Repair Advice | Typical Cost |
|---|---|---|---|---|
| Level 1 | New/modern homes in good condition | Basic | None | £300+ |
| Level 2 | Homes under 90 years old | Mid-level | General | £540–£810 |
| Level 3 | Older/altered properties | Detailed | Detailed | £775–£1,195 |
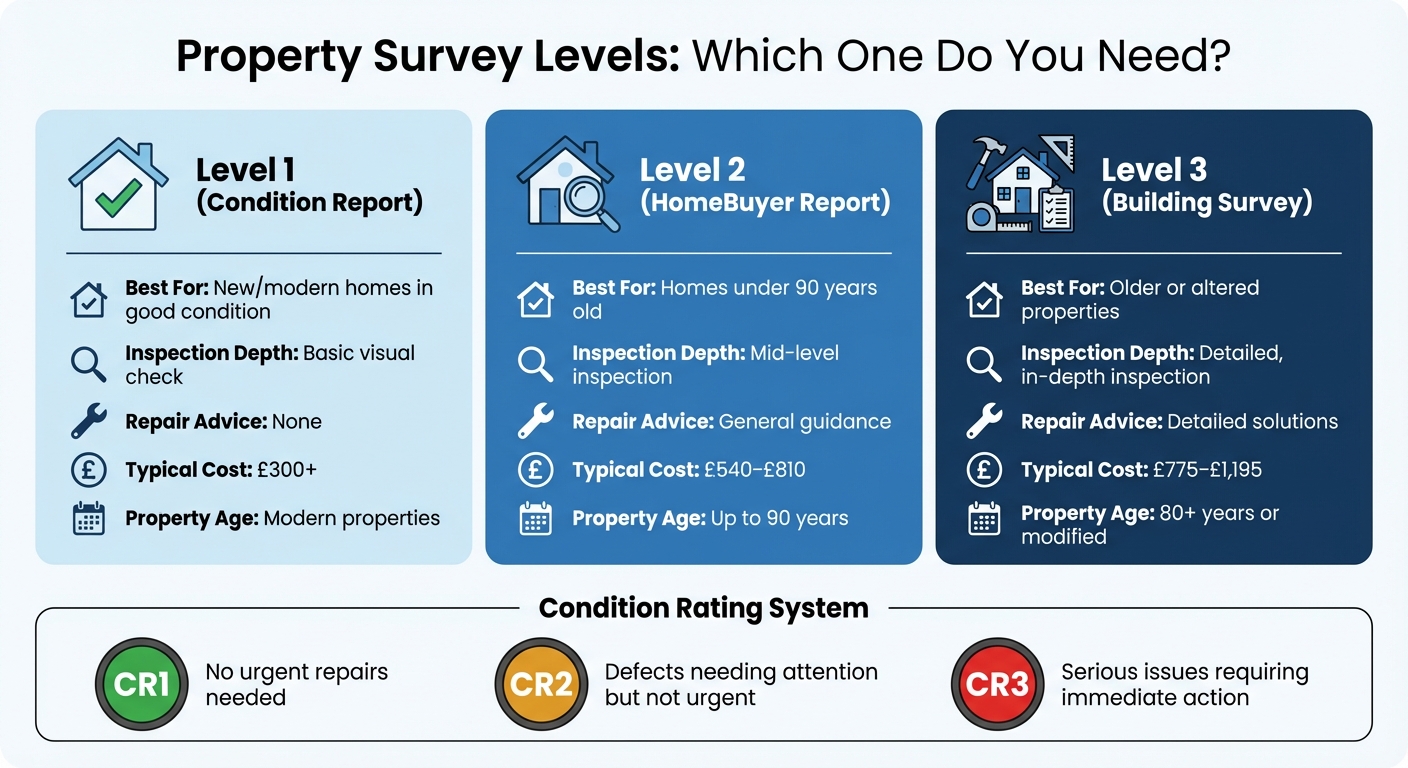
UK Property Survey Levels Comparison: Costs, Inspection Depth and Best Use Cases
Getting your property ready for a survey is all about ensuring the surveyor can do their job efficiently and accurately. This means making your home as accessible and organised as possible. As Jason Weale, Head of Customer Relations at Find My Surveyor, explains:
"The more transparent and accessible you are, the more valuable the survey becomes" [5].
By following a few simple steps, you can help the survey go smoothly and ensure a thorough inspection.
Make sure every part of your property is easy to reach. Clear pathways and entry points, and ensure spaces like the roof, basement, and attic are accessible. If you have a loft hatch, keep it unobstructed and provide a ladder if one isn’t already in place. Dark areas like cellars or attics should be well-lit to assist the surveyor. Move furniture away from external walls, especially near skirting boards, radiators, and electrical outlets, as these areas are often checked for damp or structural problems.
Outside, remove any obstacles like overgrown plants, locked gates, or parked vehicles. This allows the surveyor to properly inspect walls, foundations, drainage points, and manhole covers.
Having the right paperwork ready can save time and provide vital context for the surveyor. Collect documents such as gas safety certificates, Electrical Installation Condition Reports (EICR), and boiler service records to confirm that key systems comply with current regulations. If you’ve made any changes to the property, include planning permissions and Building Regulations completion certificates to show the work was done legally.
Other useful documents might include warranties for damp-proofing, timber treatments, double glazing, or solar panels. If your property is leasehold, details like the remaining lease duration, ground rent, service charges, and managing agent contact information should also be included. Being organised with these documents reflects good property management and helps the surveyor assess the home more effectively.
For a smoother inspection, secure pets in a separate area and ensure all window keys are available so the surveyor can test their mechanisms and check for damp around the frames. Be upfront about any past issues like flooding or roof leaks, and provide a brief timeline of these problems. Transparency helps the surveyor offer more precise advice.
Lastly, take care of minor cosmetic fixes. Dripping taps, mould in the bathroom, or scuffed paint might seem small, but addressing them can leave a better impression. As James Brook FRICS from Novello Surveyors points out:
"The surveyor will look for signs that the house has been well maintained and general upkeep has been carried out as you've lived there; such small jobs like this can make a big difference" [7].
Once you've prepared for the survey, the surveyor's job is to meticulously examine your property to identify any issues that could impact its value or safety. Using tools like damp meters, binoculars, and laser measures, they assess every detail. As Chris Bloor, MRICS Chartered Surveyor and Director of CJ Bloor Property Consultants, explains:
"During a viewing, would you really be inspecting the condition of the flashings between the chimney stack and the roof covering? Probably not - you're more likely picturing it as your future home." [2]
This is where a professional surveyor's expertise becomes invaluable. Here's a closer look at what they inspect.
The surveyor starts outside, examining the boundary features, external walls, and rainwater systems for signs of damage, wear, or subsidence. Certain types of cracks, for instance, can indicate subsidence issues [1]. Gutters and downpipes, also known as rainwater goods, are checked for blockages or leaks, as these can lead to damp problems in the walls [2].
They'll also assess joinery elements like fascias, soffits, and barge boards for rot or damage, while window and door frames are inspected for deteriorating seals. The garden isn't overlooked either - large trees with potentially invasive roots and plants like Japanese Knotweed, which can damage foundations and complicate mortgage applications, are flagged [6]. Any permanent outbuildings such as garages, conservatories, or porches are also inspected to ensure they're structurally sound [2].
Once the exterior is thoroughly checked, the surveyor shifts focus to the roof and structural elements.
The roof is inspected using binoculars or drones to check tiles, slates, chimney stacks, and flashings for any signs of damage or leaks [2]. The depth of this inspection depends on the survey level. For example, a Level 2 survey involves a visual check from the loft hatch, while a Level 3 survey requires the surveyor to physically enter the roof void to examine the structure, bracing, insulation, and look for signs of timber rot or woodworm [3].
Surveyors also evaluate load-bearing walls and floors for movement or subsidence. Techniques like the "heel-drop" test may be used to detect excessive vibration or deflection in floors. In more detailed Level 3 surveys, they might lift corners of loose floorboards to inspect the sub-floor areas [3]. Cracks in both external and internal walls are checked, and ceilings are inspected for brown stains, which could point to leaks [2].
Inside the property, the surveyor examines internal walls, ceilings, and floors for issues such as cracks, dampness, or uneven surfaces that might hint at structural concerns [2]. Windows and doors are tested to ensure they open and close properly, and any signs of decay or condensation in double-glazing are noted.
The property's services and utilities are also visually assessed. Plumbing is checked for leaks or rust on visible pipes, while heating systems are evaluated by testing radiator performance and noting the boiler's age. Electrical systems are inspected too - outdated fuse boards or wiring, particularly those predating the 1960s, may signal the need for modernisation. The "latest button press trip type" is preferred for safety [6]. Chimneys and flues are also checked for structural soundness and adequate ventilation [6].
After these visible checks, the surveyor turns their attention to less obvious but equally critical risks.
Using moisture meters and visual cues like tide marks, musty odours, or discolouration, surveyors identify damp issues [2] [6]. They also inspect the damp proof course (DPC) to ensure it’s intact and functioning as intended [2].
Timber elements throughout the property are scrutinised for signs of dry rot, wet rot, or woodworm, all of which can undermine structural stability. Roof timbers, floorboards, and joinery are examined for pest infestations, and any findings are categorised. Issues marked as Condition Rating 3 (CR3) are considered urgent and must be addressed immediately, as they pose significant safety risks [2].
After a thorough inspection, your surveyor will compile all essential observations into a detailed report. This report uses a traffic light-style system, known as Condition Ratings, to categorise any issues. Here’s how it works:
Here’s a breakdown of what to expect in your report.
The survey report provides a clear overview of the property’s structure and condition, along with descriptions of any visible defects. To give you a better understanding of these issues, the report includes photographs of key findings. These images are invaluable for illustrating the extent of any problems. As per RICS standards, surveyors are required to create "an accurate and comprehensive record of the property at the time of inspection to allow reflection during the report production stage and before the report is delivered" [4]. If you’re unsure, you can request a sample report to confirm that photographs are included.
Your report will include repair advice and maintenance tips. For Level 2 surveys, this advice is straightforward and practical. Level 3 surveys go further, offering detailed repair solutions, highlighting risks of delaying repairs, and even suggesting estimated timelines for the work. If the surveyor identifies issues that require specialist expertise, the report will recommend further investigations. Additionally, the report may reference the property’s Energy Performance Certificate (EPC), outlining its A–G rating and offering tips to improve energy efficiency.

The level of detail in your survey report depends on the type of survey you select. A Level 2 Homebuyer Survey is ideal for standard properties in decent condition. It provides a thorough visual inspection with clear, no-nonsense advice. On the other hand, a Level 3 Building Survey is much more detailed, making it perfect for older or modified properties. Chris Bloor, MRICS Chartered Surveyor and Director of CJ Bloor Property Consultants, explains:
"If the property is more than, say, 80–90 years old, is likely to need some repair work, has been extended, and you're looking for a more detailed report that explores the defects we identify and their prognosis, then a Level 3 survey is likely to be more appropriate" [2].
Level 3 reports delve deeper into construction materials, assess how defects might affect the building’s stability, and provide long-term maintenance advice - features that a Level 2 report doesn’t include. Here’s a quick comparison of the two survey levels:
| Feature | Level 2 (Homebuyer) | Level 3 (Building) |
|---|---|---|
| Construction & Condition | ✅ | ✅ |
| Major defects & safety risks | ✅ | ✅ |
| Advice on repairs/maintenance | ✅ (Basic) | ✅ (Detailed) |
| Hidden issue potential/prognosis | ❌ | ✅ |
| Long-term maintenance advice | ❌ | ✅ |
| Repair solutions & delay risks | ❌ | ✅ |
The first thing to do with your survey report is to identify any urgent issues. Many reports use a traffic light system to flag problems, making it easier to spot repairs that need immediate attention versus those that can wait. Focus on anything that could affect the structural integrity or safety of the property.
Don't just rely on the written report - speak with your surveyor to get clarity. This discussion can help you separate urgent repairs from routine maintenance tasks. As Kate Faulkner OBE, a property expert, explains, "Armed with a comprehensive survey report, you may be able to negotiate money off the price of the property to pay for existing or future works" [8]. It's also wise to share the report with your conveyancer so they can address any legal aspects tied to the defects during the transaction process.
Once you've reviewed your report, it's time to tackle the problems it highlights. Structural issues, damp, or timber decay should be prioritised. For instance, if the report mentions wet or dry rot in roof beams, treat this as a high priority since it can weaken the property’s structure. Similarly, issues like condensation or mould should be addressed by following your surveyor’s advice, which might include installing extractor fans or dehumidifiers to improve ventilation.
Getting written estimates is crucial. Not only does this help you understand the potential costs, but it also strengthens your position if you decide to renegotiate the property price. For more complex issues, such as subsidence, damp-proofing, or pest infestations, seeking advice from specialists is often necessary.

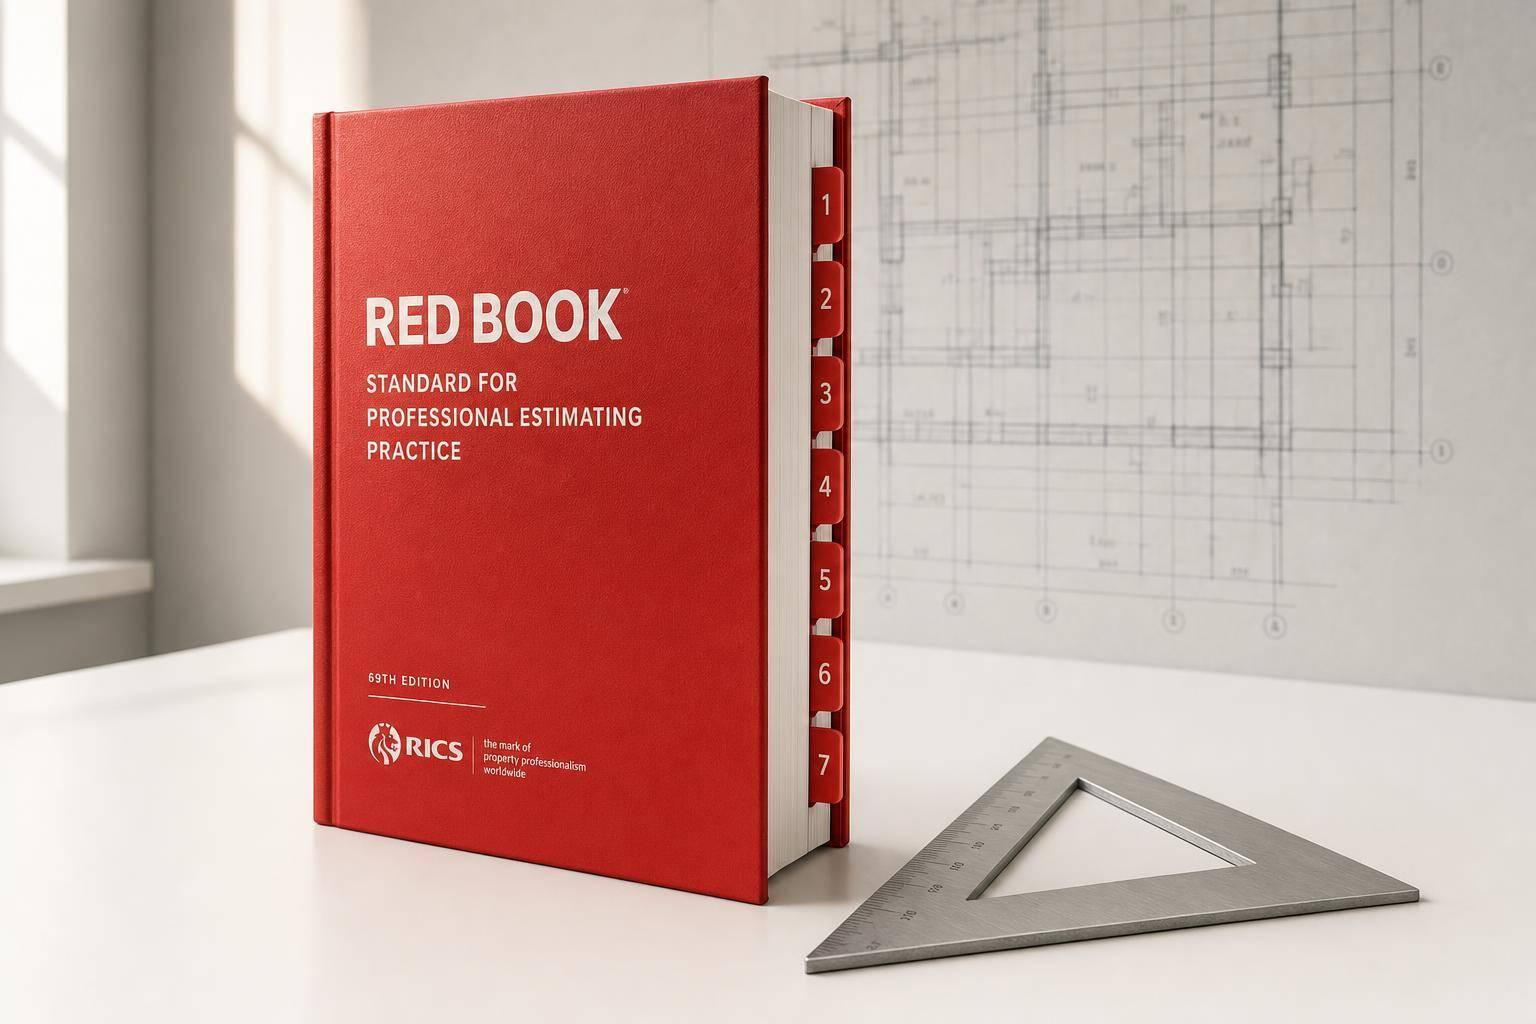
If your property requires further investigation or services, Survey Merchant offers a range of specialist options. These include land surveying, Red Book valuations, party wall agreements, lease extensions, dilapidations assessments, and project management services. For example, if you're planning an extension or need clarity on property boundaries, their land surveyors can create detailed boundary plots. If a formal valuation is required - particularly useful during negotiations - Survey Merchant’s nationwide network of multi-disciplinary surveyors provides Red Book valuations to meet your needs.
A Condition Rating 3 (CR3) signals a serious issue that demands immediate attention. This could involve structural damage, severe damp, or even health and safety hazards like asbestos. Addressing these problems promptly is crucial.
Begin by consulting your surveyor to gain a clear understanding of the defect and their advice. Next, gather quotes from qualified contractors for the necessary repairs or further investigations to assess costs and timelines. Share these details with your solicitor, who can guide you on the next steps - whether that's renegotiating the purchase price, requesting repairs, or making a conditional offer.
Focus on resolving health and safety risks first before moving forward with the purchase. Acting quickly can help you manage potential risks, avoid unexpected expenses, and ensure your property transaction stays on track.
Choosing the right property survey can feel like a big decision, but it really comes down to the age, condition, and unique features of the home you’re considering. The Royal Institution of Chartered Surveyors (RICS) offers three main options to suit different needs:
When deciding, think about the property’s age, any visible problems, and your future plans. For instance, a modern flat might only need a Level 1 survey, while a Victorian terrace or a home with quirky elements would benefit from a Level 3. Yes, the more detailed surveys come with a higher price tag, but they can reveal hidden issues that might otherwise cost you thousands in unexpected repairs. Balancing the survey cost against the potential risks will help you make a confident, informed choice.
To make your property survey go as smoothly as possible, it’s essential to have certain documents ready for the surveyor. Here’s what you’ll typically need:
Getting these documents organised ahead of time allows the surveyor to conduct a thorough inspection without unnecessary delays. For convenience, consider compiling everything into one file so it’s easily accessible during the survey.